|
|
Creating textured skies, step by step...
 |
A textured sky (also knows as a "Skybox") adds a lot of realism to your scenes but it needs specially created texture files. This tutorial guides you through the process of creating these files using a program called 'Terragen'. |
|
Step 1: Download and install Terragen
Click here to go to the Terragen website. There you can download the latest version of Terragen. The free version of Terragen can be used to make skies for Topaz 3D. |
|
|
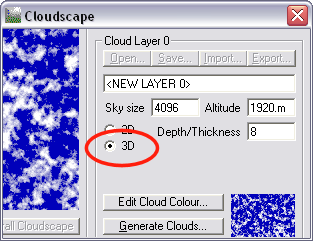
Step 2: Create your sky Use Terragen to create your sky. There are many, many tutorials on the Internet explaining how to do this (Google for "terragen tutorials" to find them...!) For skies, we're particularly interested in the "clouds" dialog, which is explained here. nb. For good looking clouds it's important to set the cloud type to "3D". |
|
|
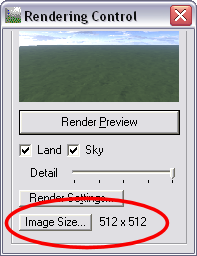
Step 3: Set the image size Set the image size to exactly 512 x 512 pixels in the "Rendering control" dialog. This size is necessary to avoid distortion of the images when you use them in a skybox, other sizes will make it look worse. 512 x 512 resolution is good enough for clouds but will looks a bit blocky if you try to add hills. For higher resolution you need a registered copy of Terragen. With a registered version of Terragen you can set the image size to either 1024 x 1024 or 2048 x 2048 to get much better image quality (again, these sizes must be exact...!) 2048 x 2048 resolution looks stunning ... but it needs an awful lot of video memory! |
|
|
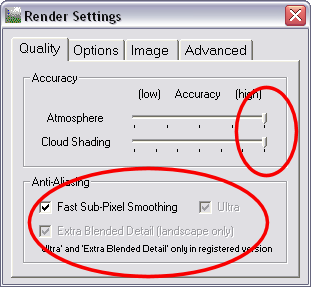
Step 4: Set the rendering options Set all image rendering options to maximum quality. |
|
|
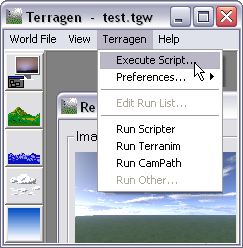
Step 5: Render the images You need to render six images with the camera looking left, front, right, back, up and down. This would be tedious to do manually, but Terragen can automate this step with a script file. We've provided a script file for you here: topaz_skybox.tgs. Save this file to disk and get Terragen to run it. It can take a long time to generate the six images so now is a good time to go out for lunch... |
|
|
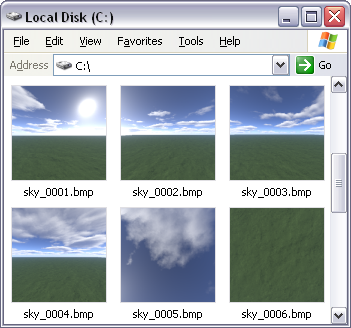
Step 6: Check the results If all has gone well you should now have six images in drive C:\. The images will be numbered from "0001" to "0006" in the exact same order order you need them in Topaz 3D.
nb. If you want the images to be stored somewhere else you can edit the script
file with a text editor (eg. Windows Notepad). The first line of the file
controls where the images go. In our script it looks like this:
|
|
|
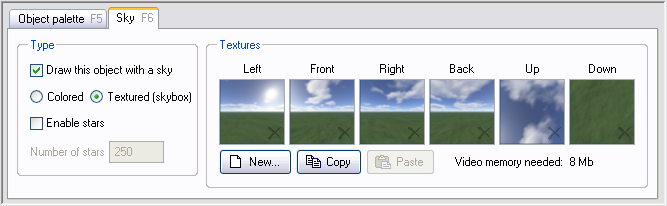
Step 7: Drop the files into Topaz 3D Switch to Topaz 3D and selected a textured sky for your object. Now pick up the six files one at a time and drop them into place in the "Textures" panel. The correct order is from image "0001" on the left to image "0006" on the right. That's it, you're done!
PS: One thing you might like to do between step 6 and 7 is to convert Terragen's ".BMP" files to a different format (eg. ".PNG") to make them smaller and reduce download times / disk space. |
|

Last update: 15 September 2008